How it works:
Share your skin goals and snap selfies
Your dermatology provider prescribes your formula
Apply nightly for happy, healthy skin
How it works:
How it works:
Share your skin goals and snap selfies
Your dermatology provider prescribes your formula
Apply nightly for happy, healthy skin
How it works:
How to take before-and-after skin progress pictures like a pro
Wow people with your skincare results—and keep track of your progress—with these tips on taking Curology-approved selfies.


Getting the right selfie can be tricky, especially if you're using them to track your skincare progress. There are many things to consider: light conditions, angles, and backdrops. When you’re specifically taking selfies to view your skin’s reactions to treatment over time, there are lots of additional considerations, like how long you should wait between photo shoots and how you should organize your images.
We’ll take you through all the steps to take skincare before-and-after pictures like a pro. That way, you can give clear images to your dermatology provider and show off your Curology glow. Not to mention, your photos can be just the thing that keeps you motivated to stay the course on your #CurologyJourney.
Ready for your close-up? We know you are, so say cheese!

How to take amazing before-and-after photos
Chances are, you’ve seen before-and-after photos where you question whether they’re actually of the same person. While the “wow!” factor is definitely there, the point of before-and-after photos is to accurately document your progress and results. After all, you’re spending time, effort, and resources to look your best—but also your trust.
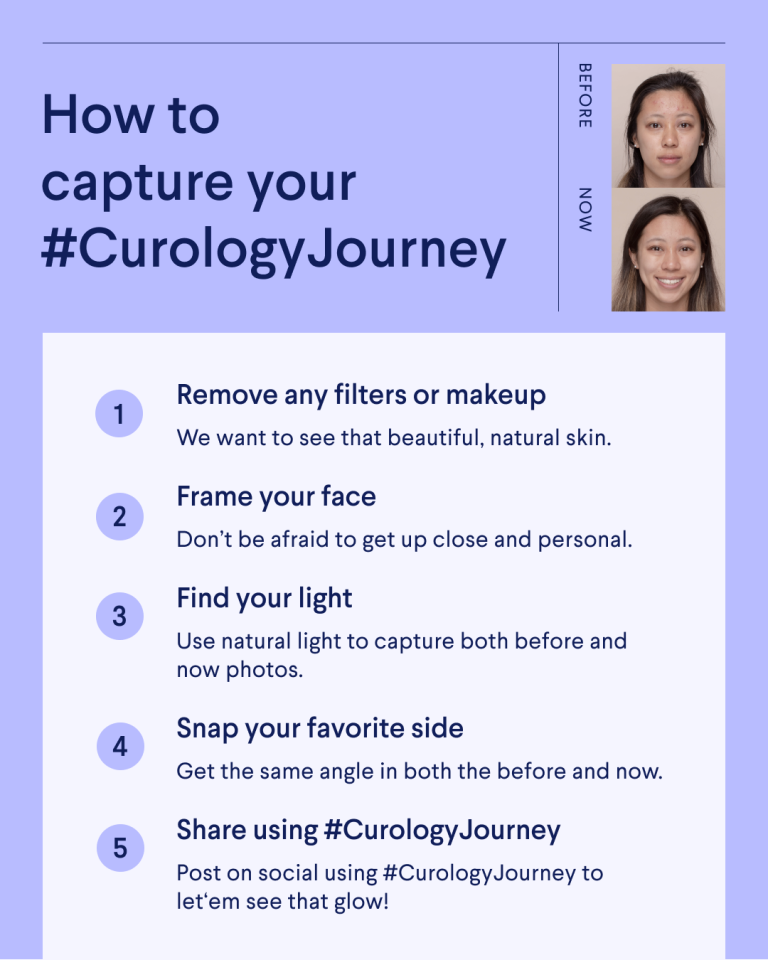
Our recommendation? Get real with your photos so you can tell how effective your skincare routine is for you. Yes, that means up-close and personal. If there’s ever been a time to photograph the perfect zit, it’s now! Follow these tips to take amazing before-and-after photos:
Remove makeup and filters. These photos are meant to capture what you really look like here and now. You want to see how far you’ve come since getting serious about your skincare. Take your photos right after washing your face, and hold off on using filters, Photoshop, or any of your other favorite photo-editing apps. While some content creators advocate wearing a moisturizer, it’s not a great idea if it leaves your face shiny. You’re going for a natural finish without pilling.
Get up-close and personal to frame your face. Don’t be shy. Fill the frame with your lovely face! You can use a tripod or hold the camera with a selfie stick to avoid distorting the image. Just make sure your full face is in the frame—a headband works well to pull your hair away from your face. You want the camera to pick up any uneven skin tone, blemishes, and oily spots. This will help your dermatology provider modify your products as your skin changes.
Find the right light to make sure your face is well-lit. Natural lighting is always ideal, so try posing near a window. If you’re outside, keep in mind that bright light can wash out your face, so move inside if you're snapping shots around noontime. Or shoot your pics during the “golden hour,” one hour after sunrise or one hour before sunset. Just remember, for the most accurate comparisons, the lighting should be as similar as possible in both your before and after photos.
Take one from the front and one from each side. Don’t worry, you don’t have a “bad side.” After taking your shots, be sure to check to ensure they’re fully lit. Nothing is worse than a cellphone shadow across your forehead when you’re trying to check your progress or update your dermatology provider.
Be confident. Know that you’re killin’ it, and share your #CurologyJourney with us on social media.
Consider these elements for the perfect selfie
Selfies tracking the progress of your skincare routine are much different than selfies for social, so it’s important to keep a few things in mind:
Quality. Focus on the quality of your photographs. Think of these photos as tools, not just quick snapshots. Most smartphone cameras are high-quality and work perfectly, but you can also opt for a DSLR camera if you happen to have one. Make sure you use the same camera settings for all your before-and-after pics. Make sure the lighting is even to avoid a grainy quality and try not to fidget or move too much so your photo isn’t blurry.
Consistency. Set a reminder in your calendar to take photos documenting the progress of your skin treatments every two weeks. Make sure you take photos at the same time of day and in the same location each time to ensure consistency. Also, be sure to review your earlier pictures to capture the same angle, facial expression, and background. You want the photos to look as similar as possible (minus the changes in your skin, of course)!
Organization. Your before-and-after photos should be organized for easy access. Save your before-and-after selfies in a special folder in your phone’s photo library to keep from having to scroll through thousands of pictures. Another trick: Take your photos in the same order: head-on, right profile, and left profile. That way, when you compare, you can easily notice your progress from all angles.
Why you should take before-and-after photos
You've invested a lot of time and care into your skincare routine. Before-and-after photos help document your dedication, consistency, and patience over time. Plus, they're also a great motivator to keep going as you can physically see how you're achieving your skincare goals.
Taking before-and-after photos allows you to:
Track your progress. It’s okay to wait a couple of weeks between photo shoots to give your cream ample time to do its work! But you don’t want to want too long to get those close-ups. It’s better to have too many than not enough. Plus, when you see your progress, you’re more likely to stick with the program.
Chronicle your skincare journey. If you experience frequent breakouts, looking back on how far you’ve come might just be the motivator you need to push past any minor setbacks (like the occasional pimple).
Provide evidence. The old saying that a picture is worth a thousand words holds true more than ever when you’re making efforts to improve those common treatment areas like your cheeks and T-zone. High-quality images serve as solid proof that you’re on the right track.

Get selfie-ready with Curology skincare
Now, let’s get you selfie-ready for your next Insta reel—way more fun, right? Curology believes in accessibility when it comes to skincare. We can help with common skin concerns like acne, anti-aging, hyperpigmentation, and even rosacea. Curology members are paired with a licensed dermatology provider, who will prescribe you a custom cream with a mix of three active ingredients for your unique skin.
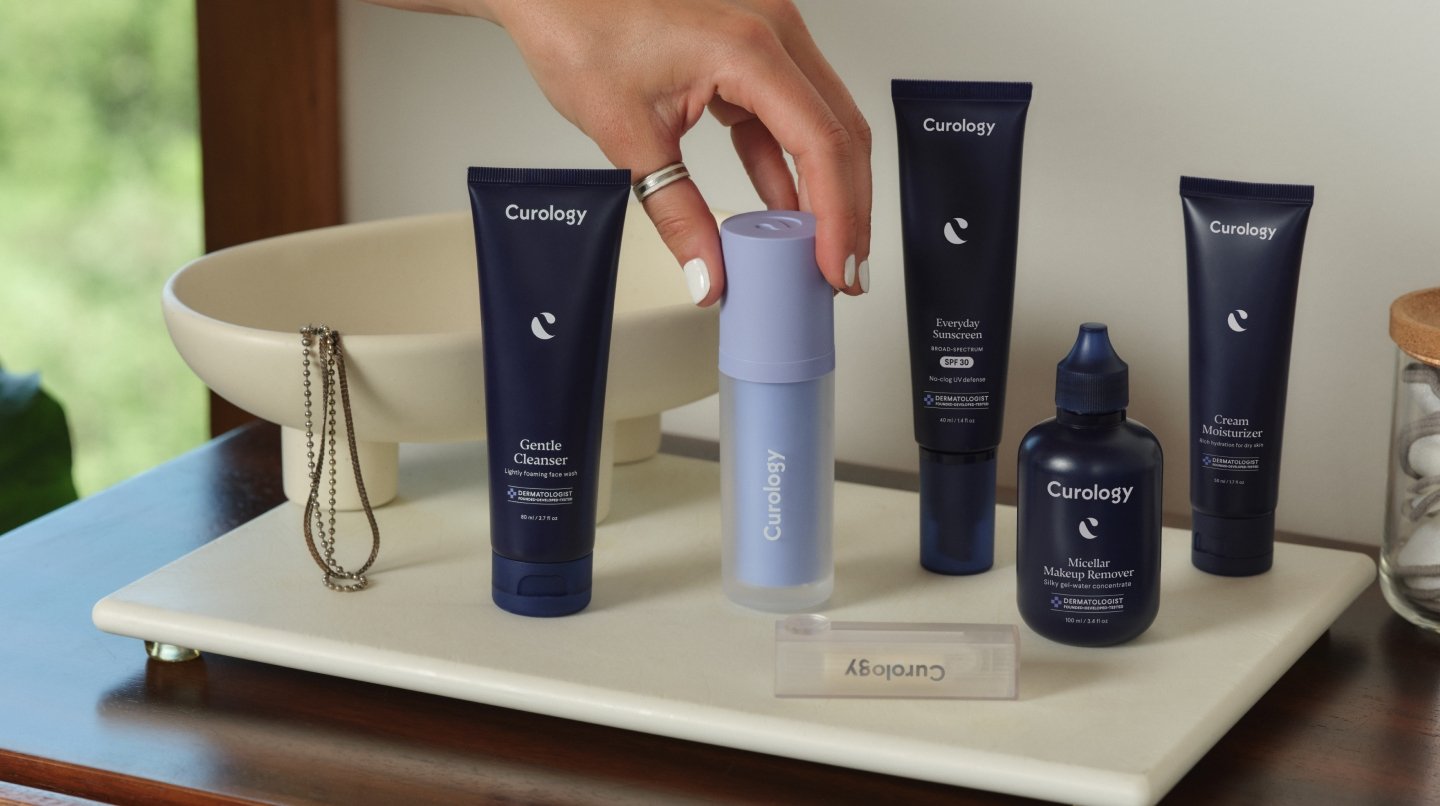
We also have a whole line of skincare products to complete your routine, each designed by dermatologists to be non-comedogenic, fragrance-free, dye-free, paraben-free, and hypoallergenic—made to keep your skin happy and healthy. Interested? You can get a free month of Curology (just pay $4.95 plus tax to cover shipping and handling on your first box).*
Get your personalized skincare routine with Curology
Get your personalized skincare routine with Curology


Take a quick skin quiz and snap a few selfies—because now you know how to like a pro!—and one of our licensed dermatology providers will evaluate your skin. Your Curology selfies are confidential—we’ll save a copy so you can look back on your progress, but it’s entirely up to you if you want to keep them between you and your Curology provider or hold them up for the world to “ooh” and “ahh.” Whatever you decide, we’re here for you on your skincare journey!
FAQs
Get real with your photos so you can tell how effective your skincare routine is for you. If there’s ever been a time to photograph the perfect zit, it’s now!
Remove makeup and filters.
Get up-close and personal to frame your face.
Find the right light to make sure your face is well-lit.
Take one from the front and one from each side.
Be confident.
You've invested a lot of time and care into your skincare routine. Before-and-after photos help document your dedication, consistency, and patience over time. Plus, they're also a great motivator to keep going as you can physically see how you're achieving your skincare goals.
This article was originally published on April 14, 2022, and updated on July 11, 2022.
* Subject to consultation. Subscription is required. Results may vary.

Curology Team

Nicole Hangsterfer, PA-C
Related Articles
Hair growth strategies: How long does minoxidil take to work? How to remove makeup without makeup remover wipesThe complete guide to face cleansers for every skin typeThe 6 best chemical exfoliators for glowing skinHow long does a rosacea flare-up last? Experts explainPopular Articles
Ask Curology: Is my cold breaking me out?Slugging: The dermatologist-approved skincare hack going viral on TikTokTretinoin vs retinol: What’s the difference?How to create a self-care routine that actually sticksYour 2023 skincare horoscopeTry prescription skincare
Get routine essentials

Good skin days ahead
- Breakouts
- Redness
- Fine lines
- Dark spots
- Hair thinning